【Human Interface Guidelines 翻訳 vol.11】iOS - Visual Design - Adaptivity and Layout
- Adaptivity and Layout(適応性とレイアウト)
- Device Screen Sizes and Orientations(デバイスの画面サイズと向き)
- Auto Layout(自動レイアウト)
- Layout Guides and Safe Area(レイアウトガイドと安全領域)
- Size Classes(サイズクラス)
- General Layout Considerations(レイアウトに関する一般的な考慮事項)
- Adapting to Changes in Context(コンテキストの変化への適応)
- Designing a Full-Screen Experience(フルスクリーンエクスペリエンスの設計)
- Additional Layout Considerations(レイアウトに関するその他の考慮事項
Adaptivity and Layout(適応性とレイアウト)
People generally want to be able to use their favorite apps on all of their devices and in any context. In an iOS app, you can configure interface elements and layouts to automatically change shape and size on different devices, during multitasking on iPad, in split view, when the screen rotates, and more. It’s important to design an adaptable interface that provides a great experience in any environment.
一般的に、人々はお気に入りのアプリをすべてのデバイスで、あらゆる状況で使用できるようにしたいと考えています。
iOSアプリでは、iPadでのマルチタスク中、分割ビュー、画面の回転時などに、さまざまなデバイスの形状とサイズを自動的に変更するようにインターフェイス要素とレイアウトを構成できます。
あらゆる環境で優れたエクスペリエンスを提供する、適応可能なインターフェースを設計することが重要です。
Device Screen Sizes and Orientations(デバイスの画面サイズと向き)
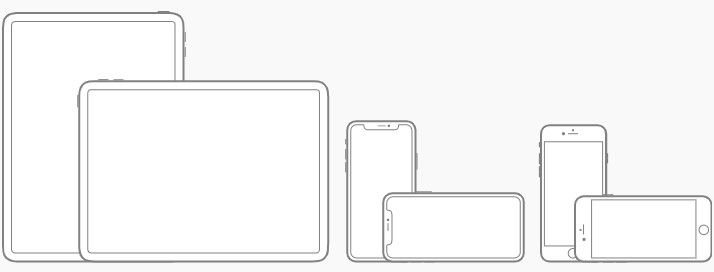
iOS devices come in a variety of screen sizes and can be used in either portrait or landscape orientation.
iOSデバイスにはさまざまな画面サイズがあり、縦向きでも横向きでも使用できます。
If your app runs on a specific device, make sure it runs on every screen size for that device. In other words, an iPhone-only app must run on every iPhone screen size and an iPad-only app must run on every iPad screen size.
アプリが特定のデバイスで実行される場合は、そのデバイスのすべての画面サイズで実行されることを確認してください。
つまり、iPhone専用アプリはすべてのiPhone画面サイズで実行する必要があり、iPad専用アプリはすべてのiPad画面サイズで実行する必要があります。


To learn how screen resolution impacts your app’s artwork, see Image Size and Resolution.
画面の解像度がアプリのアートワークに与える影響については、画像のサイズと解像度をご覧ください。
Auto Layout(自動レイアウト)
Auto Layout is a development tool for constructing adaptive interfaces. Using Auto Layout, you can define rules (known as constraints) that govern the content in your app. For example, you can constrain a button so it’s always horizontally centered and positioned eight points below an image, regardless of the available screen space.
Auto Layoutは、アダプティブインターフェイスを構築するための開発ツールです。
Auto Layoutを使用すると、アプリのコンテンツを管理するルール(制約と呼ばれる)を定義できます。
たとえば、使用可能な画面スペースに関係なく、ボタンを常に水平方向の中央に配置し、画像の下に8ポイント配置するようにボタンを制限できます。

Auto Layout automatically readjusts layouts according to the specified constraints when certain environmental variations (known as traits) are detected. You can set your app to dynamically adapt to a wide range of traits, including:
Auto Layoutは、特定の環境変化(特性)が検出されたときに、指定された制約に従ってレイアウトを自動的に再調整します。
次のようなさまざまな特性に動的に適応するようにアプリを設定できます。
- Different device screen sizes, resolutions, and color gamuts (sRGB/P3)
- Different device orientations (portrait/landscape)
- Split view
- Multitasking modes on iPad
- Dynamic Type text-size changes
- Internationalization features that are enabled based on locale (left-to-right/right-to-left layout direction, date/time/number formatting, font variation, text length)
- System feature availability (3D Touch)
- さまざまなデバイスの画面サイズ、解像度、色域(sRGB / P3)
- さまざまなデバイスの向き(縦/横)
- 分割ビュー
- iPadのマルチタスクモード
- ダイナミックタイプのテキストサイズの変更
- ロケールに基づいて有効になる国際化機能(左から右/右から左のレイアウト方向、日付/時刻/数値のフォーマット、フォントのバリエーション、テキストの長さ)
- システム機能の可用性(3D Touch)
For developer guidance, see Auto Layout Guide and UITraitCollection.
開発者向けガイダンスについては、Auto LayoutガイドとUITraitCollectionをご覧ください。
Layout Guides and Safe Area(レイアウトガイドと安全領域)
Layout guides define rectangular regions that don’t actually appear visibly onscreen, but aid with the positioning, alignment, and spacing of content. The system includes predefined layout guides that make it easy to apply standard margins around content and restrict the width of text for optimal readability. You can also define custom layout guides.
レイアウトガイドは、実際には画面に表示されない長方形の領域を定義しますが、コンテンツの配置、配置、間隔を補助します。
システムには事前定義されたレイアウトガイドが含まれており、コンテンツの周りに標準的なマージンを簡単に適用し、テキストの幅を制限して読みやすくすることができます。
カスタムレイアウトガイドを定義することもできます。
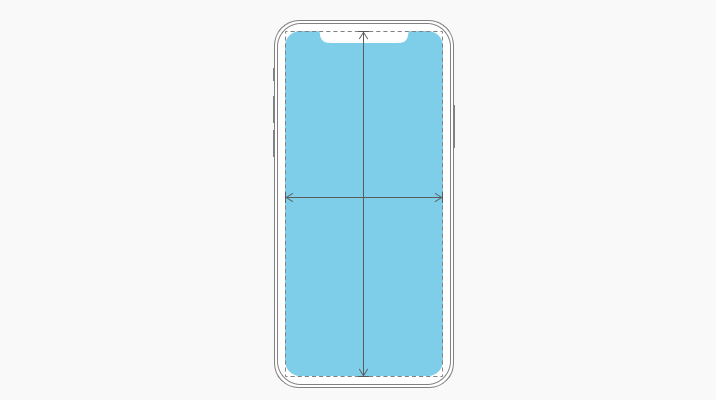
Adhere to the safe area and layout margins defined by UIKit. These layout guides ensure appropriate insetting based on the device and context. The safe area also prevents content from underlapping the status bar, navigation bar, toolbar, and tab bar. Standard system-provided views automatically adopt a safe area layout guide.
UIKitで定義された安全領域とレイアウトマージンを遵守します。
これらのレイアウトガイドは、デバイスとコンテキストに基づいて適切なインセットを保証します。
安全領域は、コンテンツがステータスバー、ナビゲーションバー、ツールバー、タブバーと重ならないようにします。
システムが提供する標準のビューは、自動的にセーフエリアレイアウトガイドを採用します。
For developer guidance, see UILayoutGuide, layoutMarginsGuide, readableContentGuide, and safeAreaLayoutGuide.
開発者向けガイダンスについては、UILayoutGuide、layoutMarginsGuide、readableContentGuide、safeAreaLayoutGuideをご覧ください。
Size Classes(サイズクラス)
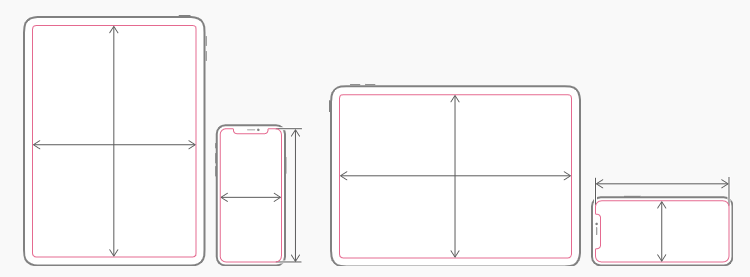
Size classes are traits that are automatically assigned to content areas based on their size. The system defines two size classes, regular (denotes expansive space) and compact (denotes constrained space), which describe the height and width of a view.
サイズクラスは、サイズに基づいてコンテンツ領域に自動的に割り当てられる特性です。
システムは、ビューの高さと幅を表す2つのサイズクラス、レギュラー(拡張スペースを表す)とコンパクト(制約付きスペースを表す)を定義します。
A view may possess any combination of size classes: - Regular width, regular height - Compact width, compact height - Regular width, compact height - Compact width, regular height
ビューはサイズクラスの任意の組み合わせを持つことができます。
- 通常の幅、通常の高さ
- コンパクトな幅、コンパクトな高さ
- 通常の幅、コンパクトな高さ
- コンパクトな幅、通常の高さ
As with other environmental variations, iOS dynamically makes layout adjustments based on the size classes of a content area. For example, when the vertical size class changes from compact height to regular height — perhaps because the user rotated the device from landscape to portrait orientation — tab bars may become taller.
他の環境バリエーションと同様に、iOSはコンテンツ領域のサイズクラスに基づいて動的にレイアウト調整を行います。
たとえば、ユーザーがデバイスを横向きから縦向きに回転させたために、垂直サイズクラスがコンパクトな高さから通常の高さに変更された場合、タブバーが高くなることがあります。
Device Size Classes(デバイスサイズクラス)
Different size class combinations apply to the full-screen experience on different devices, based on screen size.
画面サイズに基づいて、さまざまなサイズクラスの組み合わせが、さまざまなデバイスのフルスクリーンエクスペリエンスに適用されます。


Multitasking Size Classes(マルチタスクサイズクラス)
On iPad, size classes also apply when your app runs in a multitasking configuration.


General Layout Considerations(レイアウトに関する一般的な考慮事項)
Ensure that primary content is clear at its default size. People shouldn’t have to scroll horizontally to read important text, or zoom to see primary images, unless they choose to change the size.
プライマリコンテンツがデフォルトのサイズで明白であることを確認してください。
サイズを変更することを選択しない限り、重要なテキストを読むために水平方向にスクロールしたり、メイン画像を表示するためにズームしたりする必要はありません。
Maintain an overall consistent appearance throughout your app. In general, elements with similar functions should look similar.
アプリ全体で全体的に一貫した外観を維持します。
一般に、機能が類似している要素は類似しているはずです。
Use visual weight and balance to convey importance. Large items catch the eye and appear more important than smaller ones. Larger items are also easier to tap, which is especially important when an app is used in distracting surroundings, such as in the kitchen or a gym. In general, place principal items in the upper half of the screen and — in a left-to-right reading context — near the left side of the screen.
視覚的な重みとバランスを使用して、重要性を伝えます。
大きなアイテムは目を引き、小さなアイテムよりも重要に見えます。
大きいアイテムはタップするのも簡単です。これは、キッチンやジムなど、周囲に気を配るアプリを使用する場合に特に重要です。
Use alignment to ease scanning and to communicate organization and hierarchy. Alignment makes an app look neat and organized, helps people focus while scrolling, and makes it easier to find information. Indentation and alignment can also indicate how groups of content are related.
配置を使用して、スキャンを容易にし、組織と階層を伝達します。
調整により、アプリがすっきりと整理された外観になり、スクロール中にユーザーが集中できるようになり、情報を見つけやすくなります。
インデントと配置は、コンテンツのグループがどのように関連しているかを示すこともできます。
If possible, support both portrait and landscape orientations. People prefer to use apps in different orientations, so it’s best when you can fulfill that expectation.
可能であれば、縦向きと横向きの両方をサポートします。
人々はさまざまな方向でアプリを使用することを好むので、その期待を満たすことができるのが最善です。
Be prepared for text-size changes. People expect most apps to respond when they choose a different text size in Settings. To accommodate some text-size changes, you might need to adjust the layout. For more information about text usage in your app, see Typography.
文字サイズの変更に備えます。
ほとんどのアプリは、[設定]で別のテキストサイズを選択したときに反応することを期待しています。
いくつかのテキストサイズの変更に対応するには、レイアウトの調整が必要になる場合があります。
アプリでのテキストの使用の詳細については、「タイポグラフィ」を参照してください。

Provide ample touch targets for interactive elements. Try to maintain a minimum tappable area of 44pt x 44pt for all controls.
インタラクティブな要素に十分なタッチターゲットを提供します。
すべてのコントロールの最小タップ可能領域を44pt x 44pt維持するようにしてください。

Preview your app on multiple devices. You can use Simulator (included with Xcode) to preview your app and check for clipping and other layout issues. If your app supports landscape mode, make sure your layouts look great regardless of whether the device was rotated left or right. Upside-down portrait mode is not supported on full-screen iPhones. Some features, like wide color imagery, are best previewed on actual devices.
複数のデバイスでアプリをプレビューします。
シミュレーター(Xcodeに付属)を使用してアプリをプレビューし、クリッピングやその他のレイアウトの問題を確認できます。
アプリが横向きモードをサポートしている場合は、デバイスが左または右のどちらに回転したかに関係なく、レイアウトが適切に表示されることを確認してください。
フルスクリーンのiPhoneでは、逆さの縦モードはサポートされていません。
ワイドカラー画像などの一部の機能は、実際のデバイスで最適にプレビューされます。
Apply readability margins when displaying text on larger devices. These margins keep text lines short enough to ensure a comfortable reading experience.
より大きなデバイスでテキストを表示するときに読みやすいマージンを適用します。
これらのマージンは、快適な読書体験を確保するためにテキスト行を十分に短く保ちます。
Adapting to Changes in Context(コンテキストの変化への適応)
Maintain focus on the current content during context changes. Content is your highest priority. Changing focus when the environment changes can be disorienting and frustrating, and can make people feel like they’ve lost control of the app.
コンテキストの変更中は、現在のコンテンツに焦点を当ててください。
コンテンツが最優先です。環境が変化したときに焦点を変更すると、方向感覚が失われイライラしたり、人々がアプリの制御を失ったように感じる場合があります。
Avoid gratuitous layout changes. When someone rotates a device, the entire layout doesn’t have to change. For example, if your app shows a grid of images in portrait mode, it doesn’t have to present the same images as a list in landscape mode. Instead, it might simply adjust the dimensions of the grid. Try to maintain a comparable experience in all contexts.
不必要なレイアウト変更は避けてください。
誰かがデバイスを回転させても、レイアウト全体を変更する必要はありません。たとえば、アプリが縦向きモードで画像のグリッドを表示する場合、横向きモードで同じ画像をリストとして表示する必要はありません。代わりに、グリッドの寸法を調整するだけです。
すべてのコンテキストで同等のエクスペリエンスを維持するようにしてください。
If it’s essential that your app run in a single orientation, support both variants. An app that runs only in landscape mode should be usable regardless of whether the device rotates left or right. An app that runs only in portrait mode should rotate its content 180 degrees when the device rotates 180 degrees — except on iPhone X, which doesn’t support upside-down portrait mode. If your app doesn’t rotate automatically when someone holds the device in the wrong orientation, they’ll know instinctively to rotate it. You don’t need to tell them.
アプリを単一の方向で実行することが不可欠な場合は、両方のバリエーションをサポートしてください。
横向きモードでのみ実行されるアプリは、デバイスが左または右に回転するかどうかに関係なく使用できるはずです。
縦向きモードでのみ実行されるアプリは、デバイスが180度回転するときにコンテンツを180度回転させる必要があります。ただし、iPhone Xでは縦向きモードの逆さをサポートしていません。
誰かが間違った方向にデバイスを持っているときにアプリが自動的に回転しない場合、彼らは本能的にそれを回転させることがわかります。それらを伝える必要はありません。
Customize your app’s response to rotation according to context. A game that lets people move a character by rotating the device, for example, probably shouldn’t switch orientations during gameplay. It could, however, display menus and intro sequences based on the current orientation.
状況に応じて、ローテーションに対するアプリの応答をカスタマイズします。
たとえば、人々がデバイスを回転させることによってキャラクターを動かすことができるゲームは、ゲームプレイ中におそらく方向を切り替えるべきではありません。
ただし、現在の向きに基づいてメニューやイントロシーケンスを表示することはできます。
Aim to support both iPad and iPhone. People appreciate having the flexibility to run your app on either type of iOS device. If certain features of your app require iPhone-specific hardware — like telephony — consider hiding or disabling those features on iPad and letting people use your app's other features.
iPadとiPhoneの両方をサポートすることを目指します。
どちらのタイプのiOSデバイスでもアプリを実行できる柔軟性があることを人々は高く評価しています。
アプリの特定の機能でテレフォニーなどのiPhone固有のハードウェアが必要な場合は、それらの機能をiPadで非表示にするか無効にして、アプリの他の機能を使用できるようにすることを検討してください。

Be mindful of aspect ratio differences when reusing existing artwork. Different screen sizes may have different aspect ratios, causing artwork to appear cropped, letterboxed, or pillarboxed. Make sure that important visual content remains in view on all display sizes.
既存のアートワークを再利用する場合は、アスペクト比の違いに注意してください。
画面サイズによってアスペクト比が異なり、アートワークが切り取られたり、レターボックス化されたり、ピラーボックス化されたりする場合があります。
重要なビジュアルコンテンツがすべてのディスプレイサイズで表示されるようにしてください。
Designing a Full-Screen Experience(フルスクリーンエクスペリエンスの設計)
Extend visual elements to fill the screen. Make sure backgrounds extend to the edges of the display, and that vertically scrollable layouts, like tables and collections, continue all the way to the bottom.
画面いっぱいにビジュアル要素を拡張します。
背景がディスプレイの端まで伸びており、テーブルやコレクションなどの垂直方向にスクロール可能なレイアウトが一番下まで続いていることを確認してください。
Avoid explicitly placing interactive controls at the very bottom of the screen and in corners. People use swipe gestures at the bottom edge of the display to access features like the Home screen and app switcher, and these gestures may cancel custom gestures you implement in this area. The far corners of the screen can be difficult areas for people to reach comfortably.
画面の一番下や隅にインタラクティブなコントロールを明示的に配置しないでください。
ユーザーはディスプレイの下端でスワイプジェスチャーを使用して、ホーム画面やアプリスイッチャーなどの機能にアクセスします。これらのジェスチャーは、この領域に実装したカスタムジェスチャーをキャンセルする場合があります。
画面の隅は、人々が快適に到達するのが難しい領域になる可能性があります。

Inset essential content to prevent clipping. In general, content should be centered and symmetrically inset so it looks great in any orientation, isn’t clipped by rounded corners, isn’t hidden by a sensor housing, and isn’t obscured by the indicator for accessing the Home screen. For best results, use standard, system-provided interface elements and Auto Layout to construct your interface and adhere to the layout guides and safe area defined by UIKit. When the device is in landscape orientation, it may be appropriate for some apps — like games — to place tappable controls in the lower portion of the screen (extending below the safe area) to allow more room for content. Use matching insets when placing controls at the top and bottom of the screen, and leave ample space around the Home indicator so people don't accidentally target it when trying to interact with a control. Because the Home indicator remains centered on the screen, its location relative to your app’s interface may change.
クリッピングを防ぐために必須コンテンツを挿入します。
一般に、コンテンツは中央に配置され、対称的にはめ込まれているため、どの方向でも見栄えがよく、角の丸い部分で切り取られたり、センサーハウジングで隠されたり、ホーム画面にアクセスするためのインジケーターで隠れたりすることはありません。
最良の結果を得るには、標準のシステム提供のインターフェース要素と Auto Layout を使用してインターフェースを構築し、UIKitによって定義されたレイアウトガイドと安全領域に準拠します。
デバイスが横向きの場合、ゲームなどの一部のアプリでは、画面の下部(安全領域の下まで伸びる)にタップ可能なコントロールを配置して、コンテンツのためのスペースを増やすことが適切な場合があります。
画面の上下にコントロールを配置するときは、一致するインセットを使用し、ホームインジケーターの周りに十分なスペースを残して、コントロールを操作するときに誤ってターゲットにしないようにします。
ホームインジケーターは画面の中央に留まるため、アプリのインターフェイスに対する相対的な位置が変わる可能性があります。

Inset full-width buttons. A button that extends to the edges of the screen might not look like a button. Respect the standard UIKit margins on the sides of full-width buttons. A full-width button appearing at the bottom of the screen looks best when it has rounded corners and is aligned with the bottom of the safe area — which also ensures that it doesn't conflict with the Home indicator.
full-width buttonsを挿入してください。
画面の端まで延びるボタンは、ボタンのように見えない場合があります。
全幅ボタンの両側にある標準のUIKitマージンを尊重してください。
画面の下部に表示される全幅のボタンは、角が丸く、安全領域の下部と揃っている場合に最もよく見えます。
これにより、ホームインジケーターと競合しないことも保証されます。
Don't mask or call special attention to key display features. Don't attempt to hide a device's rounded corners, sensor housing, or indicator for accessing the Home screen by placing black bars at the top and bottom of the screen. Don't use visual adornments like brackets, bezels, shapes, or instructional text to call special attention to these areas, either.
主要な表示機能をマスクしたり、特別な注意を促したりしないでください。
画面の上下に黒いバーを配置して、デバイスの丸い角、センサーハウジング、またはホーム画面にアクセスするためのインジケーターを非表示にしないでください。
これらの領域に特別な注意を喚起するために、ブラケット、ベゼル、図形、説明テキストなどの視覚的な装飾を使用しないでください。
Be mindful of the status bar height. The status bar is taller on full-screen iPhones than on older iPhones. If your app assumes a fixed status bar height for positioning content below the status bar, you must update your app to dynamically position content based on the current device. Note that the status bar on full-screen iPhones doesn't change height when background tasks like voice recording and location tracking are active.
ステータスバーの高さに注意してください。
フルスクリーンのiPhoneのステータスバーは、古いiPhoneよりも高くなっています。
アプリがステータスバーの下にコンテンツを配置するために固定のステータスバーの高さを想定している場合は、現在のデバイスに基づいてコンテンツを動的に配置するようにアプリを更新する必要があります。
フルスクリーンのiPhoneのステータスバーは、音声の録音や位置追跡などのバックグラウンドタスクがアクティブな場合、高さが変化しないことに注意してください。
If your app currently hides the status bar, reconsider that decision for full-screen iPhones. Full-screen iPhones have more vertical space for content than older iPhones, and the status bar occupies an area of the screen your app probably won't fully utilize. The status bar also displays information people find useful. It should only be hidden in exchange for added value.
アプリが現在ステータスバーを非表示にしている場合は、フルスクリーンのiPhoneについてその決定を再検討してください。
フルスクリーンのiPhoneは、コンテンツを表示するための垂直方向のスペースが古いiPhoneよりも多く、ステータスバーは、アプリが十分に活用できない画面の領域を占めます。
ステータスバーには、ユーザーが役立つと思う情報も表示されます。
付加価値と引き換えにのみ非表示にする必要があります。
Allow auto-hiding of the indicator for accessing the Home screen sparingly. When auto-hiding is enabled, the indicator fades out if the user hasn't touched the screen for a few seconds. It reappears when people touch the screen again. This behavior should be enabled only for passive viewing experiences like playing videos or photo slideshows.
ホーム画面へのアクセスを控えるためにインジケーターの自動非表示を許可します。
自動非表示が有効になっている場合、ユーザーが画面に数秒間触れなかった場合、インジケーターはフェードアウトします。再び画面をタッチすると再び表示されます。
この動作は、ビデオや写真のスライドショーの再生などのパッシブな視聴体験に対してのみ有効にする必要があります。
Additional Layout Considerations(レイアウトに関するその他の考慮事項
)
Make sure your website looks great on an edge-to-edge display. See Designing Websites for iPhone X on webkit.org.
ウェブサイトが端から端までディスプレイで見栄えがよいことを確認してください。 webkit.orgの「Designing Websites for iPhone X」をご覧ください。

